Showing posts with label Natural HomeMaking. Show all posts

Wednesday, September 19, 2012

Natural Homemaking: Juicing

Most people like some type of juice...but imagine having it freshly made! When juice is freshly made (juiced) the enzymes and vitamins are more potent giving you a very healthy dose of many things you need! You can juice fruits and vegetables...and it is delicious!

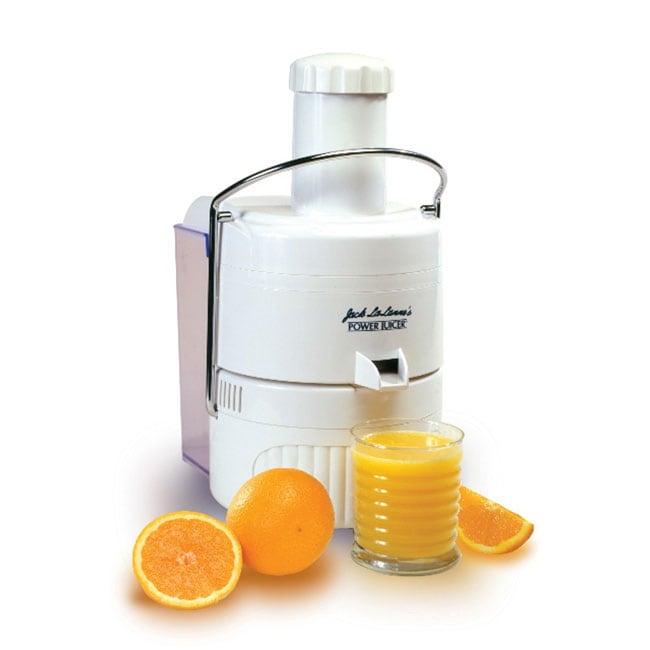
In April of this year, my husband bought me a Jack LaLanne Power Juicer.  It works GREAT! It is not the most efficient so there is a fair amount of pulp (non-juice) left, but for us juicing once a day, it is very good.  I am not sure what type of juicer Missy and Chip have, but I know theirs is more expensive but also much more efficient.  This saves them money as they use it way more than I do, so it saves them money on fruit.  Since we only do it about once a day, it was better for us to get a more mid-grade quality one and save the money on the machine.

Photo Courtesy
There are many different recipes to juice, but in reality - have fun with it! We have made melon combos, vegetable combos, and fruit/vegetable combos.  We usually just use whatever we have on hand.  My husband loves carrot juice, so anytime I juice for him, it usually has carrots in it with an abundance of fruit.  I don't usually do as many vegetables, as I tend to put those in green smoothies instead.

Juicing is a great way to get important vitamins and enzymes, while drinking delicious juice of fresh fruit.  It tastes amazing, and it is a great way to begin going a natural, healthy route.

Wednesday, September 12, 2012

Natural Homemaking: Natural Conditioner - Guest Writer Kristen

A couple of years ago, I was introduced to the no-poo method of shampooing: 

Baking soda. Vinegar. Water. 

I loved it! However, my husband (who has a keen sense of smell) wasn't particularly fond of my hair carrying a whiff of vinegar. So what's a frugal natural-wanna-be to do?? Alas!

To take the place of the vinegar, I have introduced Coconut oil to my daily hair regimen. 


* Coconut oil contains Vitamin-E. Nearly everyone knows the importance of vitamin-E for skin and hair. It keeps scalp and skin healthy and hair rejuvenated.
    
* Coconut Oil has a high moisture retaining capacity, since it is not broken down easily nor evaporated. It does not let moisture escape thus keeping hair moistened and soft. This prevents breakage of hair.
   
* Coconut Oil also has very good anti dandruff agents with its fatty acids. A regular application can help you get rid of dandruff for ever.

After you get out of the shower, drop a pea sized amount in one hand and rub together. Then evenly distribute through hair, using a comb if you can. Do not put more than a pea sized amount. Trust me. 
There are so many health benefits in using coconut oil! Do your own research and be amazed. 


Kristen Lisemby Lee is a happy wife to her best friend and preacher of the Gospel and a blessed mommy of one adorable little boy. She was home-educated and is a college graduate with a degree in Bible Arts. She finds joy in ministry, homemaking, writing, and being with family and friends. She is currently writing a book about purity and the faithfulness of God, inspired by her blog, The King’s Bride. When she’s not on the road, running errands, changing diapers, or picking up toys off the living room floor, she writing about marriage, motherhood, ministry, and what it means to be pure and set-apart women for Jesus Christ.

Her contact information:


Wednesday, September 5, 2012

Natural Homemaking: Cloth Diapers

For you Moms this may apply to you right now.  For many of you, it may be in the distant future.  But...today's subject is cloth diapers.  I know MANY people who have heard the word "cloth diapers" and pretty much freaked out about how disgusting it is.  But, in reality, it really isn't that much worse...and it is far cheaper.

Take these numbers for disposable...  Assume that your baby goes through 8 diapers a day (for the first few months that is actually pretty low) and there are 7 days in a week.  That totals to 56 diapers every week.  If you get diapers in bulk, that is approximately $18-$20 a week.  That's about $100 a month. You are going to be doing diapers for probably about 24 months...which is $2400 for each child.  But that is the concerning part...it's for EACH child. The numbers add up.

Photo Courtesy
 Now look at the numbers for cloth... If you look around, you can get all the diapers you need for between $200-$300.  They last for a long time (I fully intend to reuse the ones I am using right now for future children), they are better on the environment, and they are less likely to have diaper rashes.  Yes, you have to wash them...but as a Mom, you do plenty of wash anyway.  Two-three extra loads of laundry each week really doesn't seem like a big deal. (I wash mine every 2-3 days...depending how many I go through.)

Photo Courtesy
There are plenty of different types of diapers and all of them have their own merits.  I have decided to go with prefold diapers, snappis (instead of diaper pins), and one-size diaper covers.  The one-size diaper covers have multitude of snaps so that you can tighten and loosen them throughout your baby's time in diapers while using the same diaper cover the whole time.  It is awesome!
Photo Courtesy
My favorite site for finding cloth diapers is Nicki's Diapers.  This site has great prices, and also has excellent information if you are just starting into the world of cloth diapers.  So...while you may not have kids, it is still something to think about in the future.  And if you do have kids...I definitely recommend cloth diapering.  It is cheaper, better for the environment, and better for the babies as you are less likely to have diaper rashes.  And as an added bonus...they just looks plain cute. :)

Photo Courtesy

Wednesday, August 29, 2012

Natural Homemaking: Cleaning (Part 5)

I am sure you have often walked into the house and thought "This could smell a lot nicer."  If you haven't, please pass on your trick! :)  Mine doesn't smell "bad" - but it doesn't smell "good" either.  Sometimes it just needs some sprucing up.  So here are a couple of things that you could do to help it smell much nicer!

Linen Spray & Air Freshener
1 Tbsp isopropyl alcohol
1 tsp Lavender Essential Oil (or an essential oil of your choice)
Water (Most would say it needs to be distilled, but I use tap water)

Mix all of the ingredients together in a spray bottle.  Mine is in a 12 oz bottle, and what isn't used up by the alcohol and lavender oil (all that remaining free space) I fill with water.  You don't NEED the alcohol, but it keeps the water and oil mixed together a little better so you don't have to shake it as much.  I then spray this mixture on linens, couches, and in the air just to freshen our house up a bit.

For other things you could use a carpet deodorizer (found in part 2 of this series) or you could scrub your couches down which is found at this site: Nuts for Apples.

Photo Courtesy

Wednesday, August 22, 2012

Natural Homemaking: Cleaning (Part 4)

Ready for the fourth part of Natural Homemaking: Cleaning? 


Photo Courtesy 


This one has a dual-purpose.  While I use these for cleaning, these are also my diaper wipes. Yes, I make my own diaper wipes.  It might sound a little weird -- but it works and it is awesome.  (They not only clean different things around my house great, but they also clean my baby up without giving him a diaper rash as he has very sensitive skin!)

I also have to admit that this is not my original recipe...  A friend gave this to another one of my friends who gave it to me...so I do not take credit for this - so I hope it benefits you just as much!

Baby & Cleaning Wipes
1 Roll Paper Towels - must be heavy duty
1 Gallon sized plastic zipper bag
2+ Cups warm water*
2 tsp baby wash
1 tsp olive oil

Cut paper towel roll in half.  Save half of the paper towel roll for the next time you need to make them, and place the other half in the gallon sized bag.  Pour remaining ingredients over the paper towels.  Zip up the bag.  Smash the water mixture around the paper towels.  Pull paper towels out of bag and set bag aside near the other half a roll of paper towels for next time.  Pull out cardboard insert. Pull paper towel out of center to start the roll off.  Put in some sort of container to keep the paper towels moist.  Mine stay moist for about 2 weeks in a normal diaper wipes container.

*While the original recipe calls for 2 cups of water, the maker of this recipe noted that it might need a little more or less depending where you live and what type of paper towels you use.  With my climate and type of paper towels, I usually end up using about 2 and 1/2 cups of water -- but you will need to experiment to see what works for you.

Photo Courtesy

Wednesday, August 15, 2012

Natural Homemaking: Cleaning (Part 3)

Welcome to Natural Homemaking: Cleaning (Part 3).  Today's post will be quick - full of quick hints that I use in my house!  Ready? OK!
Photo Courtesy
Want something to quickly disinfect the countertops or cutting boards without having to scrub and pull out all sorts of different solutions?  Here are two options!

Keep a squirt bottle of hydrogen peroxide under the kitchen sink.  Spray down those countertops and cutting boards, and wipe clean with a paper towel or rag.  You are then good to go. 

....Or you could keep a squirt bottle of 50/50 white vinegar and water with 5-6 drops of tea tree or lavender oil mixed in and use the same process!

Photo Courtesy

Want a fast fabric softener but don't have one on hand and don't want to have to mix it up? 

Drop a capful (approximately 1/4 cup) of white vinegar in your load of laundry and they will come out feeling nice and soft!

Photo Courtesy

While this one isn't exactly "natural" - this is my go-to for stains in the clothes.  With a baby in the house and plenty of action flying around, inevitably a shirt or some sort of clothing gets something in it that will stain.  When I have a chance, I pour some Dawn dish soap (it does have to be Dawn, at least, in my experience) and scrub it into the fabric.  I let it sit for about 15 minutes, then rinse it out.  I then place that wet article of clothing in front of a window to let it get natural light (it does not need to be sunny - just natural light).  I check it the next day to make sure it looks like the stain is getting out.  If it is, it goes in with the next load of laundry.  If not, I repeat the process. I've never had to do it more than twice.  This works for oil and grease stains, as well.

If it is not a really bad stain, I will simply dampen the clothes with water, and place it in the natural light in front of the window (living in a rainy, cloudy climate has taught me that it does not need to be sunny!).  I leave it for a day, and then throw it in the wash with the rest of the clothes!

Photo Courtesy
...Ok, so that wasn't as quick as I expected...  But...those are your quick hints for today!

Wednesday, August 8, 2012

Natural Homemaking: Cleaning (Part 2)

Welcome to the second installment of Natural Homemaking: Cleaning! This just goes over a few more basic "recipes" for natural cleaning supplies! Here we go!

Photo Courtesy

Toilet and Bathtub Scrubbing Compound
2 cups baking soda
1/2 cup liquid soap (I use whatever is generic and cheapest)
3/4 cup water
3 Tbsp vinegar
4-5 drops Lavender or Tea Tree Oil

Combine the above ingredients and then pour into a squeeze bottle of some sort. I use an old dishsoap container as it is what I had on hand. This compound I use on anything porcelain...so I also use it on my porcelain kitchen and bathroom sink. 

Photo Courtesy


Carpet Deodorizer
1/2 Cup borax
1 Cup cornmeal

Mix together.  Sprinkle on carpet.  Let sit for 45-90 minutes. Vacuum up. (Some people have told me to be careful not to do this too often as sometimes the borax can damage a vacuum - so just want to throw that warning out there. If you are really worried about it, look it up in your owner's manual. I haven't had a problem, however.)

Photo Courtesy

Wednesday, August 1, 2012

Natural Homemaking: Cleaning (Part 1)

While I have not given up the series Natural Remedies, I am running out of things to properly put into a weekly series.  I will have Natural Remedies posts in the future when I actually have something profitable to say.  Writing about things I don't really know about wouldn't be very interesting, and I don't have much else to say in that area at the moment.  :)  So I am sticking with the "Natural" theme and adding a twist! Natural Homemaking is this week's topic! :)

Photo Courtesy


One of the things I have been working on during my marriage this past year is eliminating all those chemical bottles that we have for cleaning and replacing them with natural, home-made products.  This not only makes it healthier, it also makes it far cheaper!  After experimenting for quite some time, here are a few of the recipes that I use in my home! :) I hope you might enjoy them and put them to use!

Photo Courtesy

Furniture Dusting Spray and Polish
1/2 cup olive oil
6 Tbsp white vinegar
4-5 tsps lemon juice

Mix together and place in an old spray or squirt bottle.  Spray or squirt on to wood furniture or rag and dust and polish the furniture! :) You will need to shake this mix everytime you use it as the "ingredients" separate so make sure you have a good top on it.  I have some friends who say that it needs to be refrigerated as the lemon juice sours, but I have never had a problem with it.  I prefer to leave it at room temperature (but in a cool area) as I don't like the consistency of cooler olive oil quite so much.

Photo Courtesy


All-Purpose Cleaner
4-5 Tbsp White Vinegar
1 Tbsp Dish Soap (I usually use Dawn, as I think it works better)
2-3 Cups Warm Water
4-5 Drops of Lavender or Tea Tree Oil

Mix together while water is warm (it dissolves the soap better). Pour into spray bottle.  This is perfect for using on appliances and countertops - but it can be used for many other things, too. :)

Photo Courtesy